S3 Integration and HTTP Forwarding
In this document, we are going to see how we can record streams to S3-compatible systems(AWS, OVH, Digital Ocean, etc.) and Configure HTTP forwarding.
Using S3 services is more cost-effective than storing files on your own server. It’s also easy to manage. Furthermore, S3 services have a lot of API capabilities. For example, you can add CORS policies, rules, and triggers to your system.
By following this documentation, you can store MP4, WebM, and HLS files and preview them to your cloud storage automatically.
Record streams to AWS S3
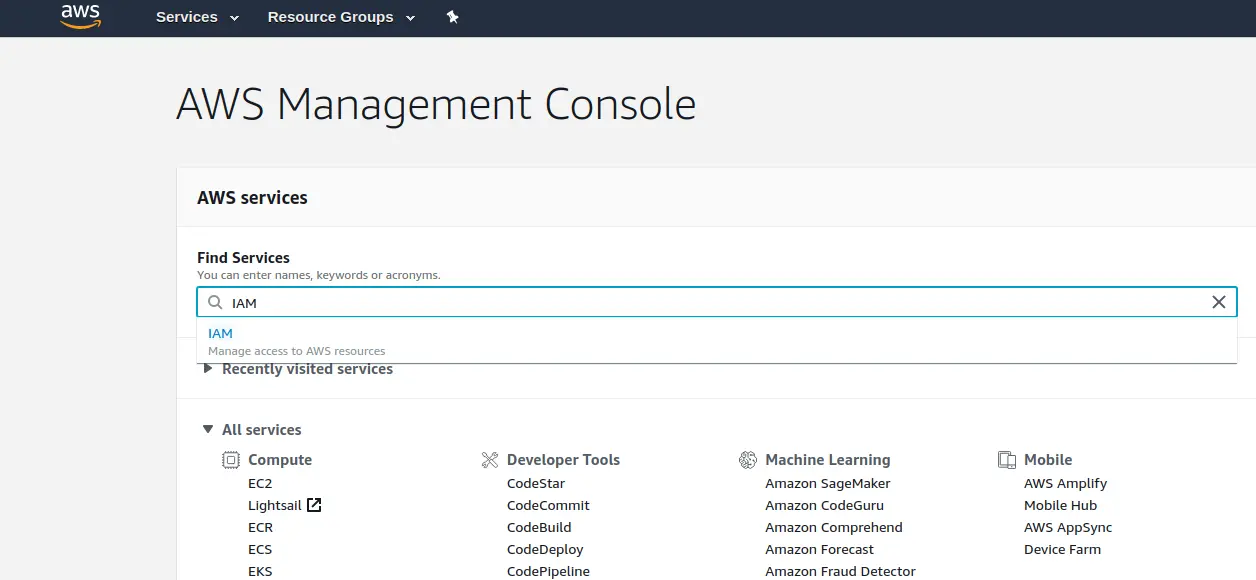
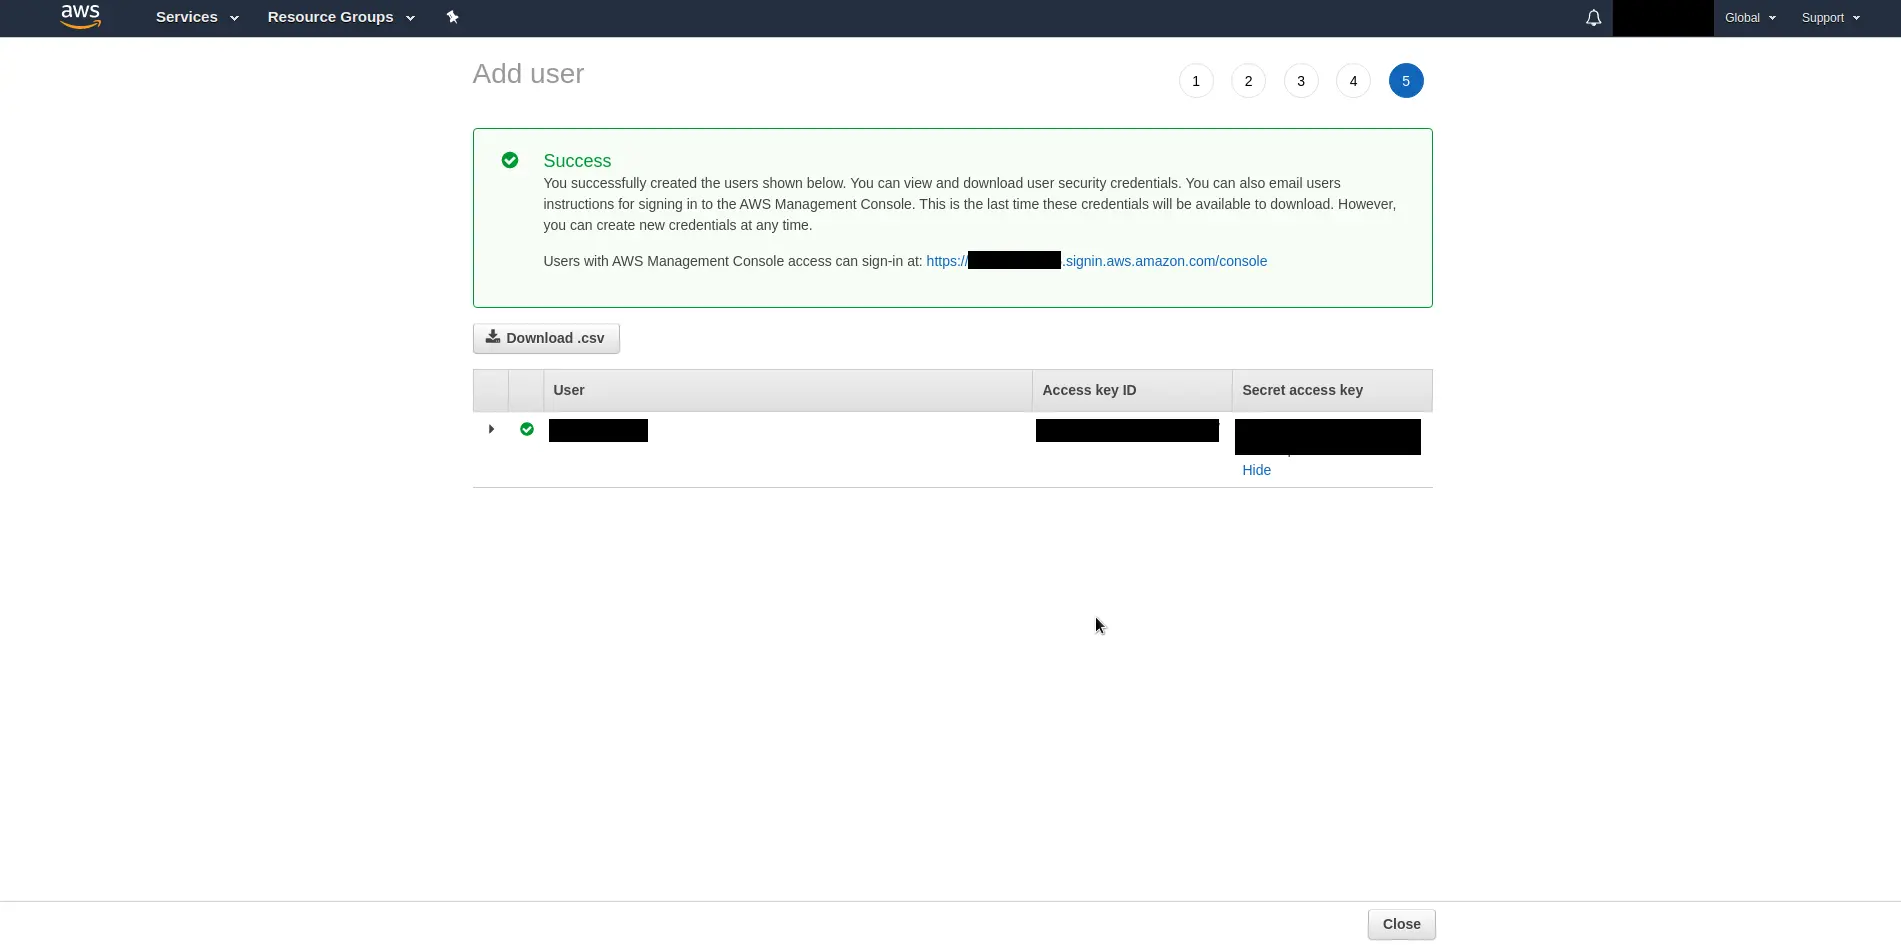
In order to programmatically access S3, you should have an access token and secret keys. You can create a programmatic user to have an access token and secret key from the AWS IAM(Identity and Access Management) console.
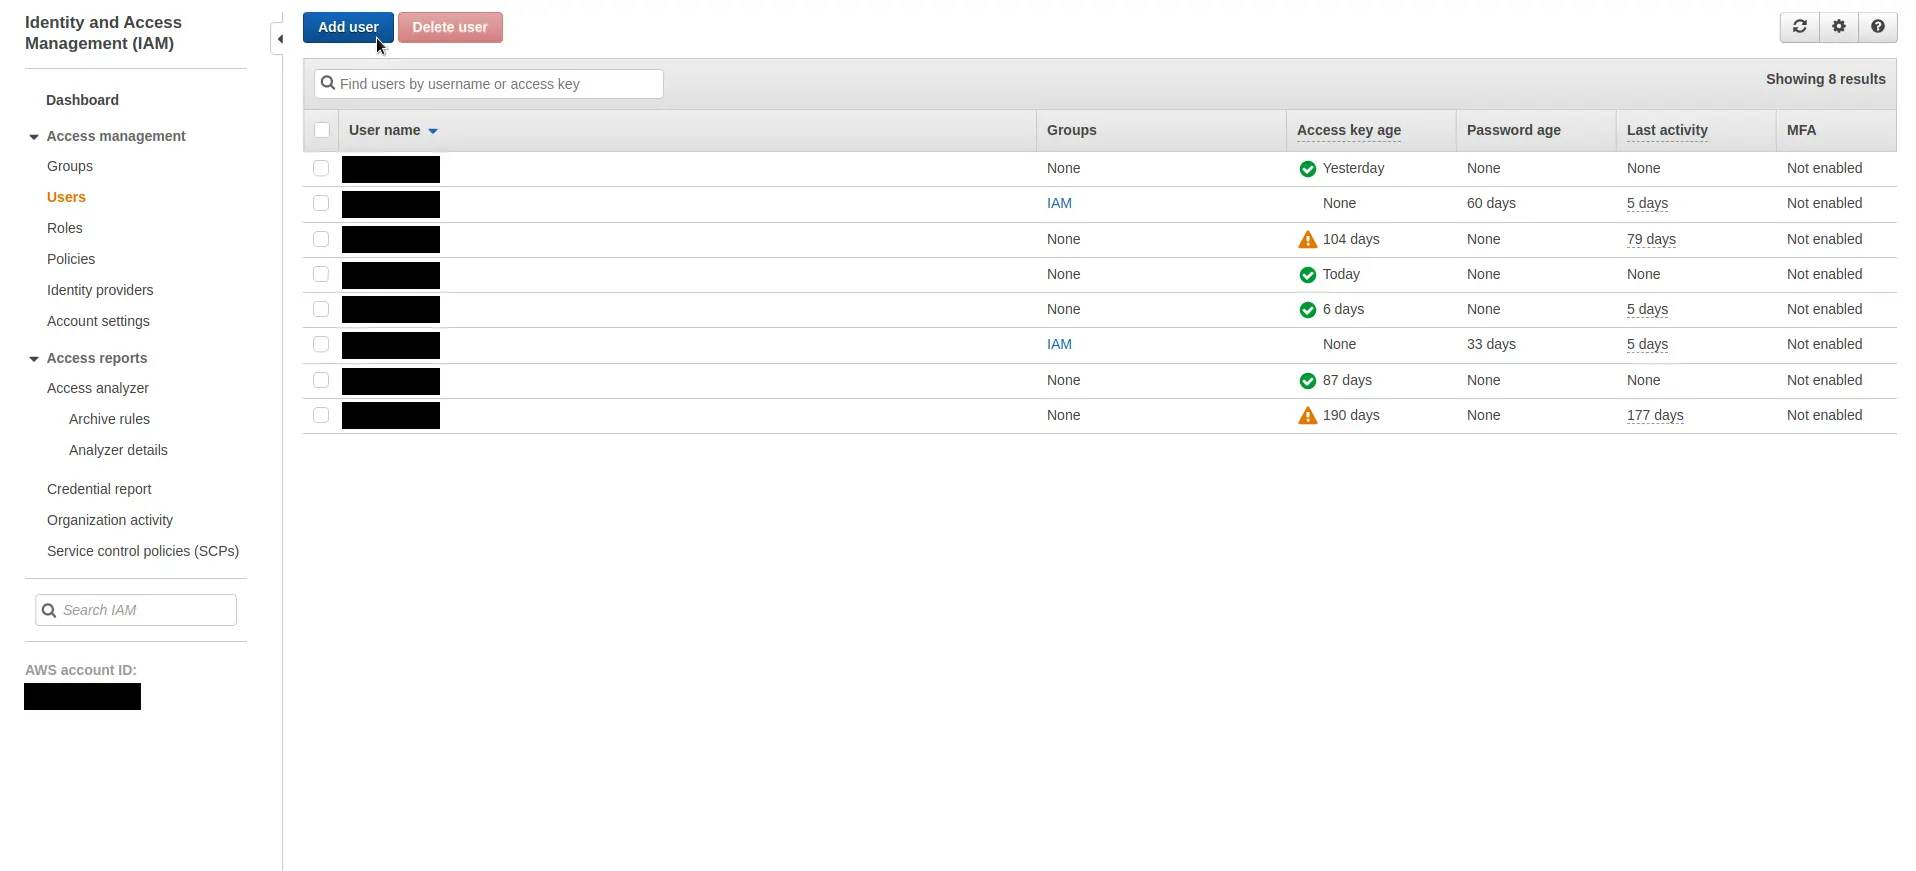
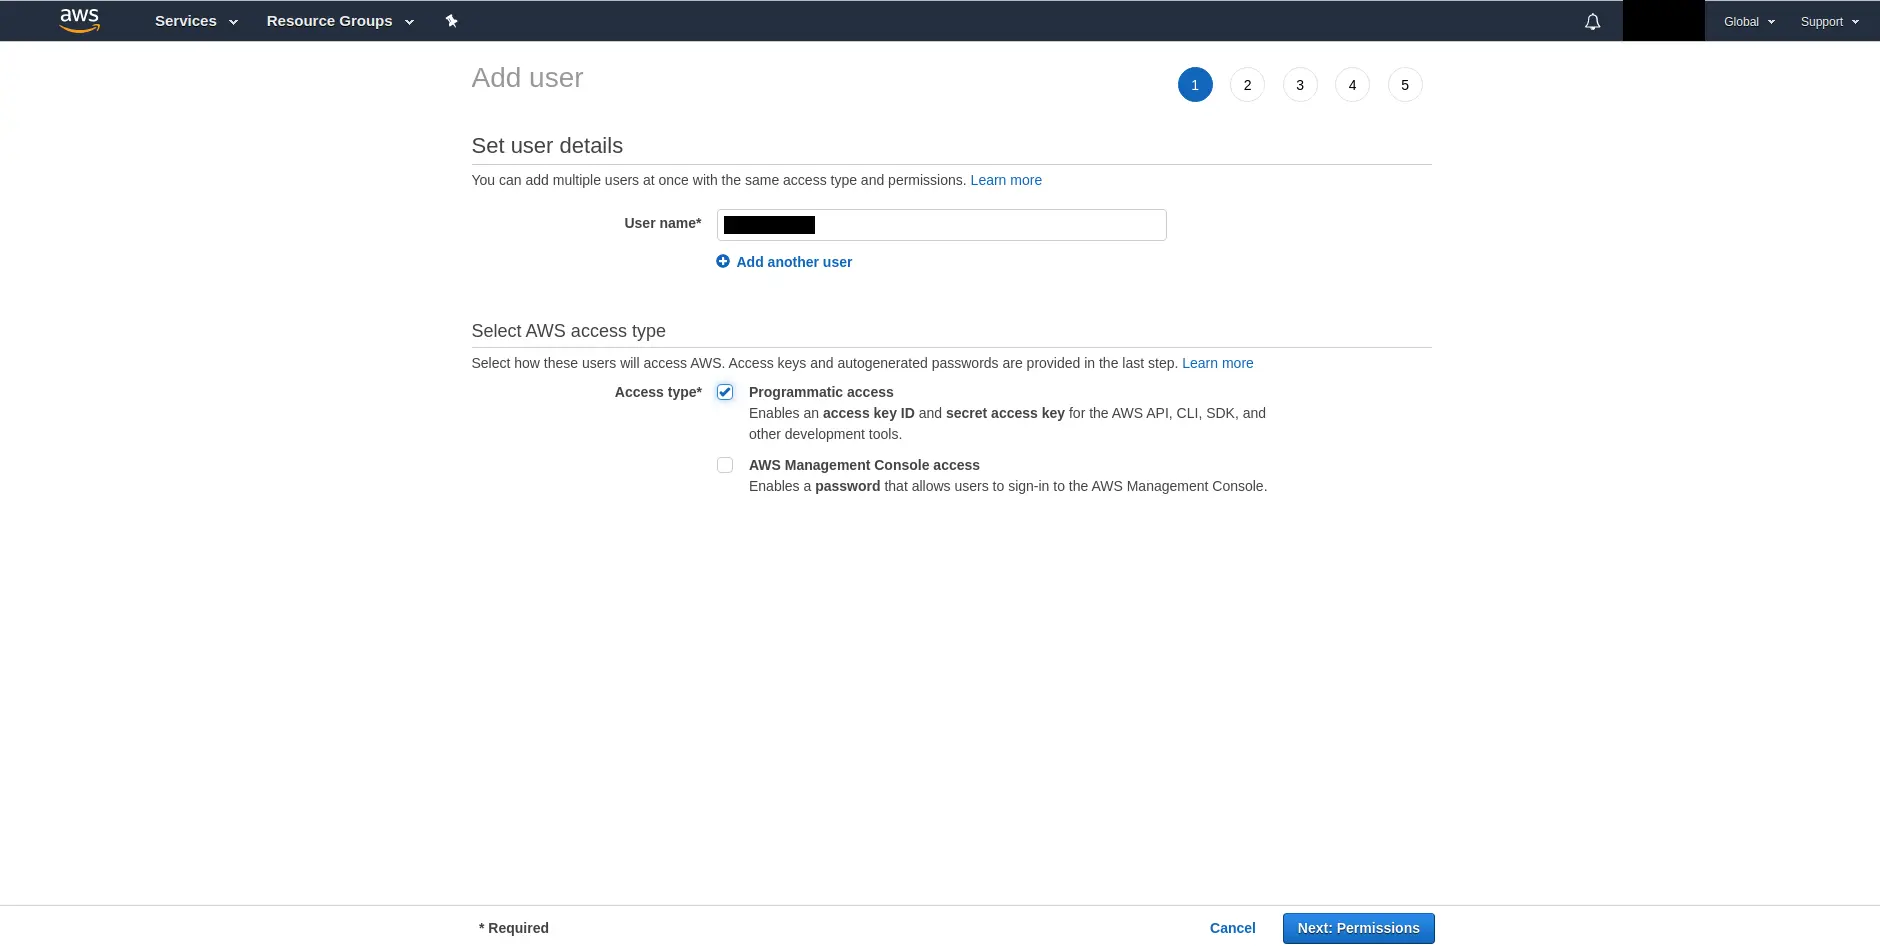
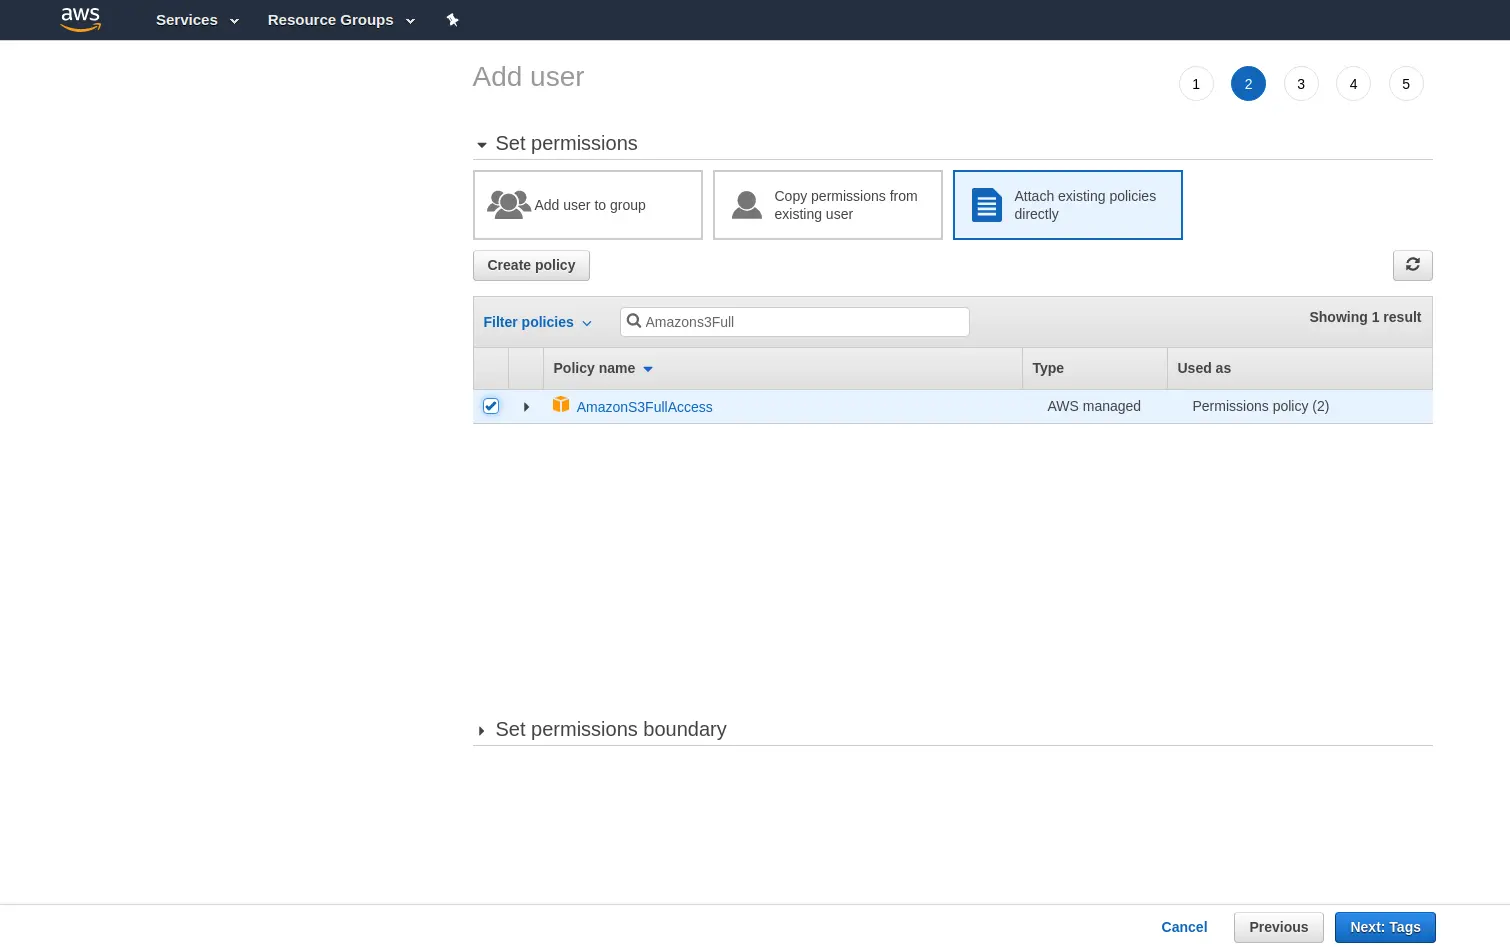
Just Add User by checking the Programmatic Access box and then in the next section click Attach existing policies directly and add AmazonS3FullAccess access permission to this user. Copy the access token and secret key for this user.
Right now, you should have the access token, secret key, and bucket name in your hand.
You also need to know the region of your bucket. If you do not have any bucket, you can create it on S3 Console
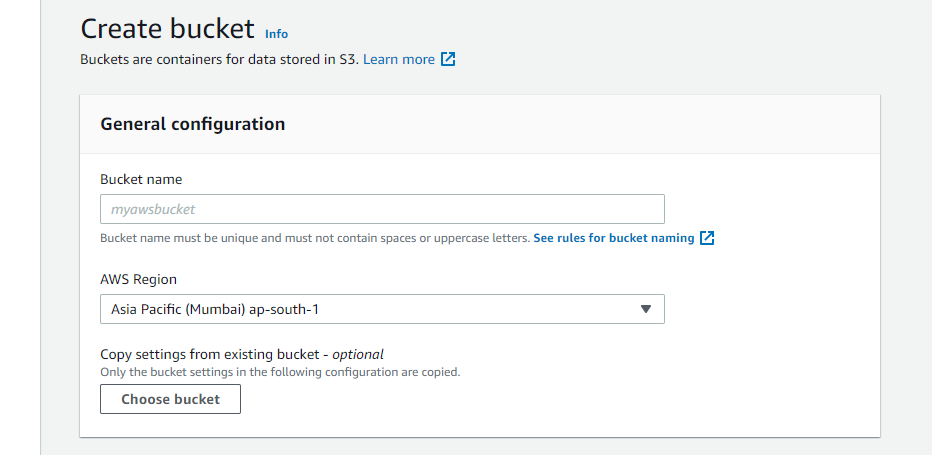
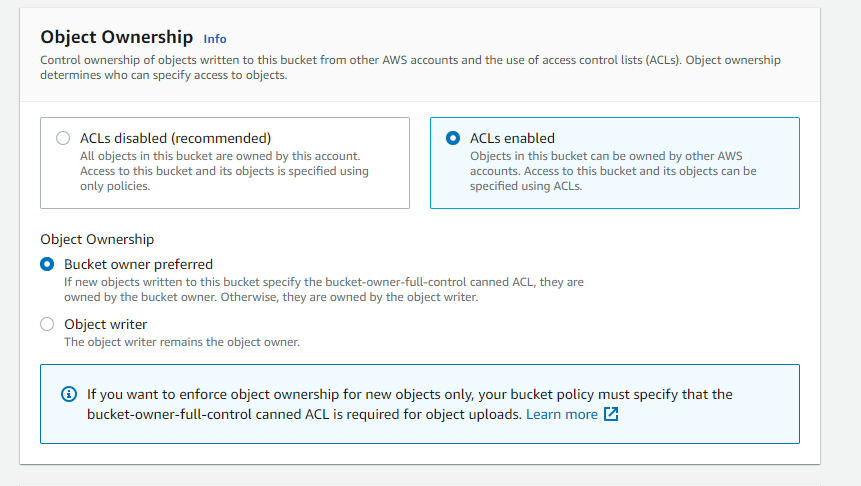
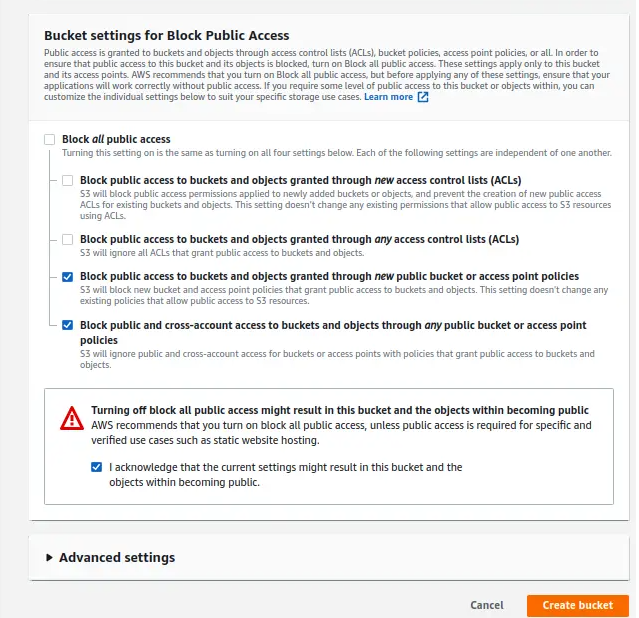
Here you see the sample S3 credentials. You need to set to yours:
Then, log in the http://your_ams_server:5080, enable the Record Live Streams as MP4 and Enable S3 Recording, enter the S3 credentials you have created, and save the settings.
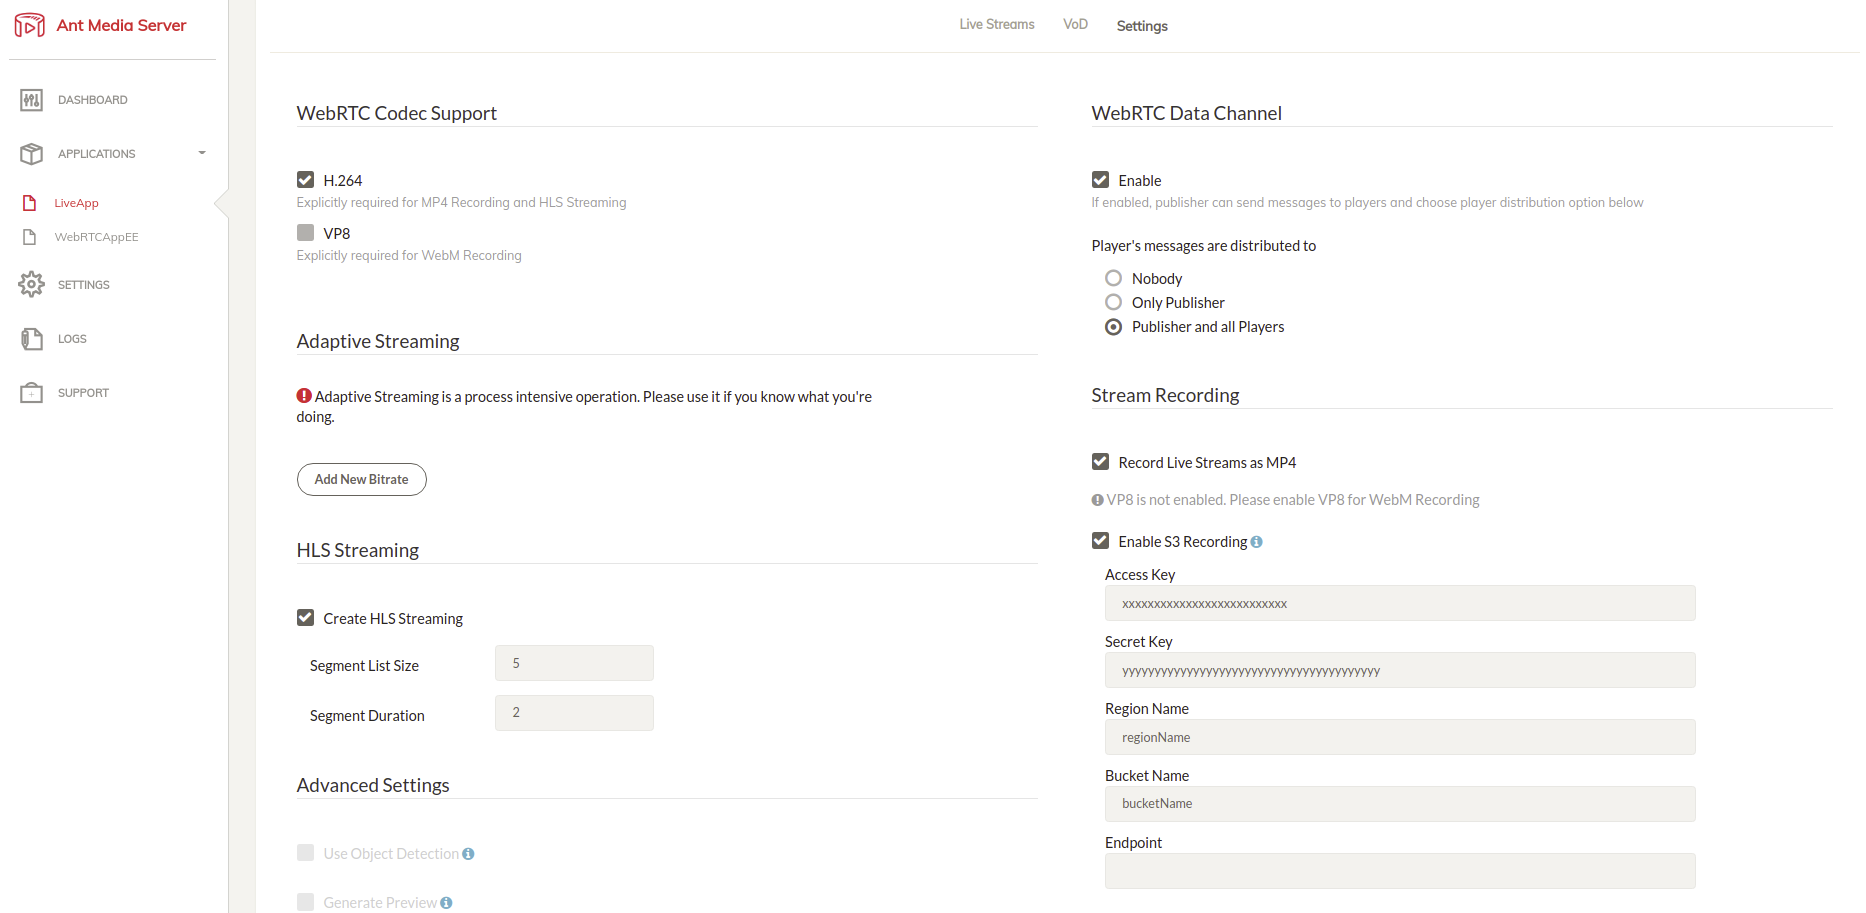
Your MP4 files and Preview files will be uploaded to your S3 Storage automatically.
Record streams to OVH Object Storage
OVH is a cost-effective cloud provider and it is preferred by many people. If you installed Ant Media Server on an OVH cloud instance, you may want to upload your stream recordings to S3 storage. You could do that with a few steps. Let start!
Firstly, you need to generate a Secret Key and Access Key with your OpenStack username/password. You can learn more about it in OVH's docs.
After generating Secret Key and Access, you just need to create an Object Storage as an image.
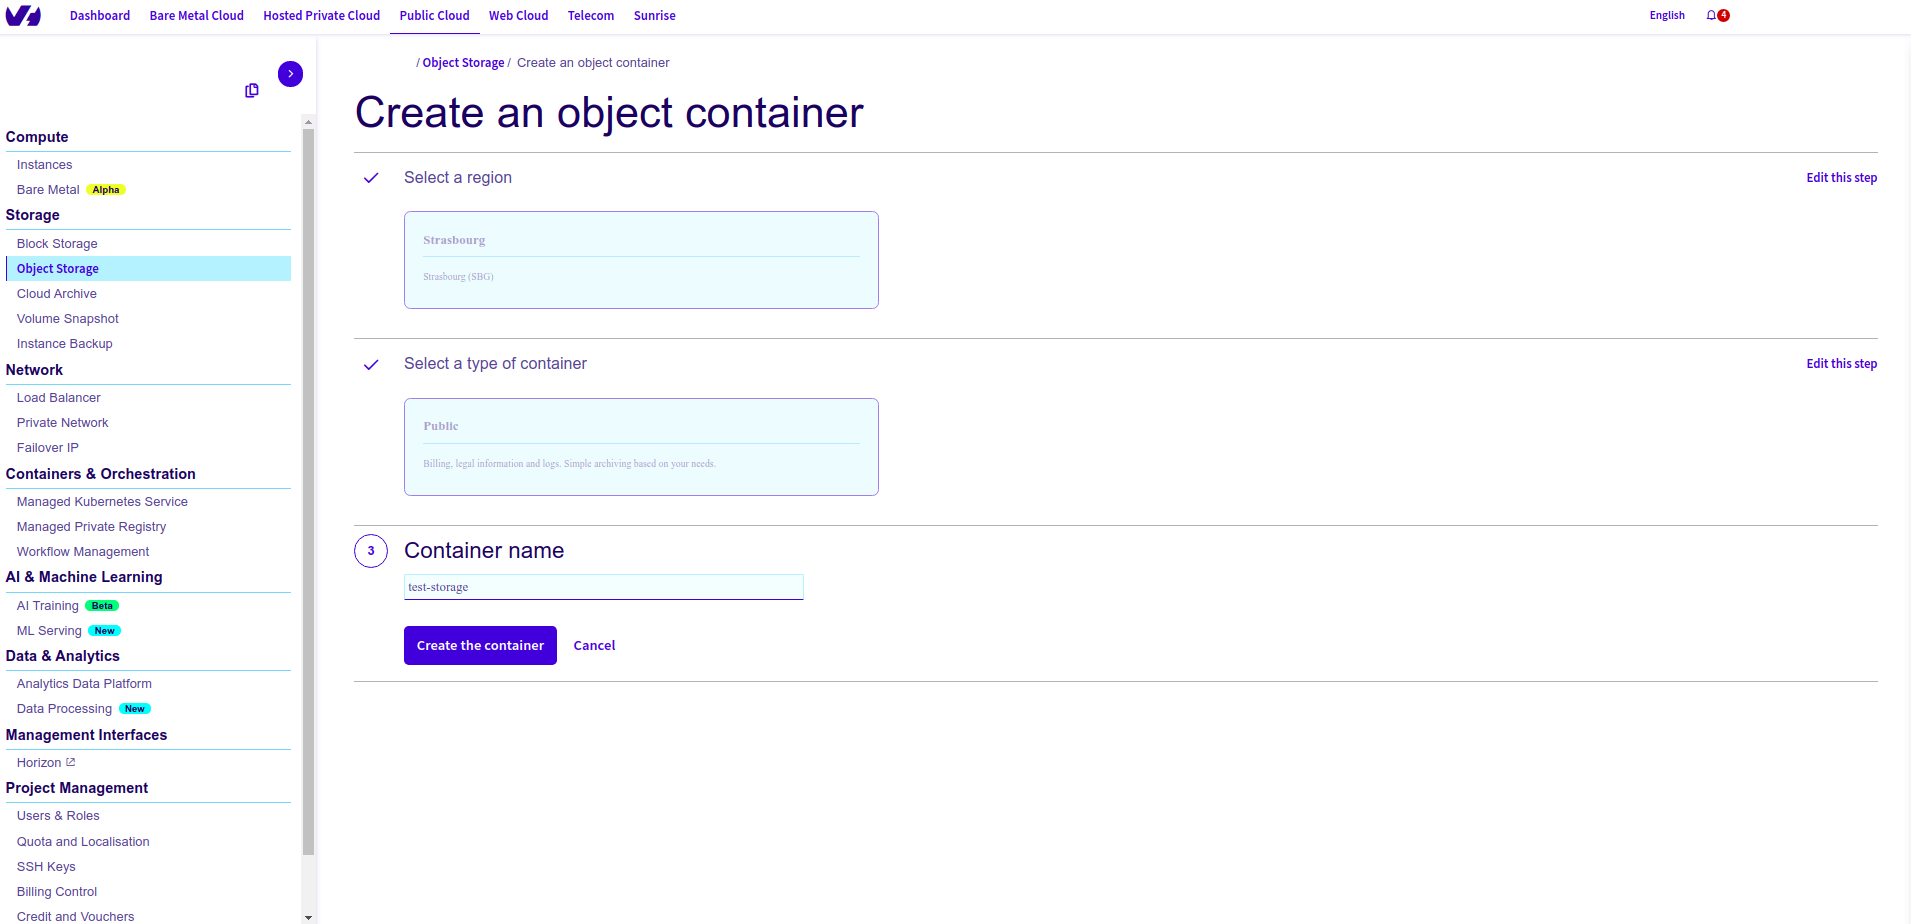
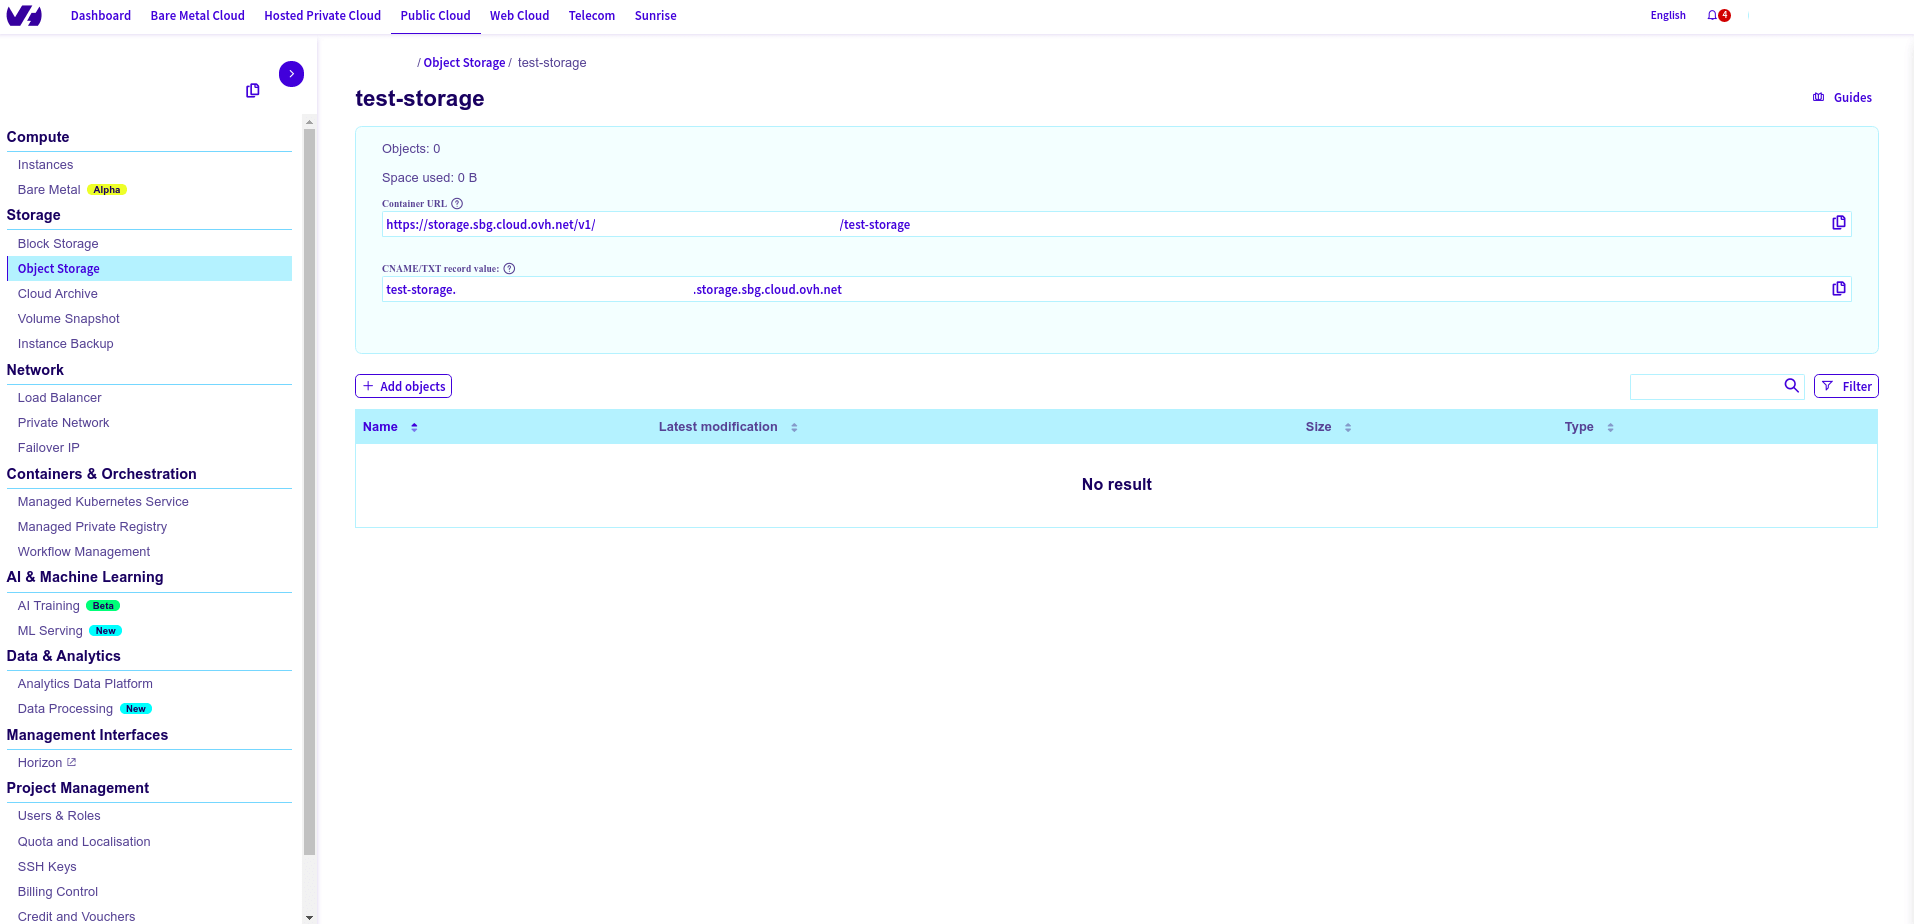
You will see the Dashboard below after clicking Create the Container.
Here you see the sample S3 credentials. You need to set to yours:
Then, log in the http://your_ams_server:5080, enable the Record Live Streams as MP4 and Enable S3 Recording, enter the S3 credentials you have created, and save the settings.
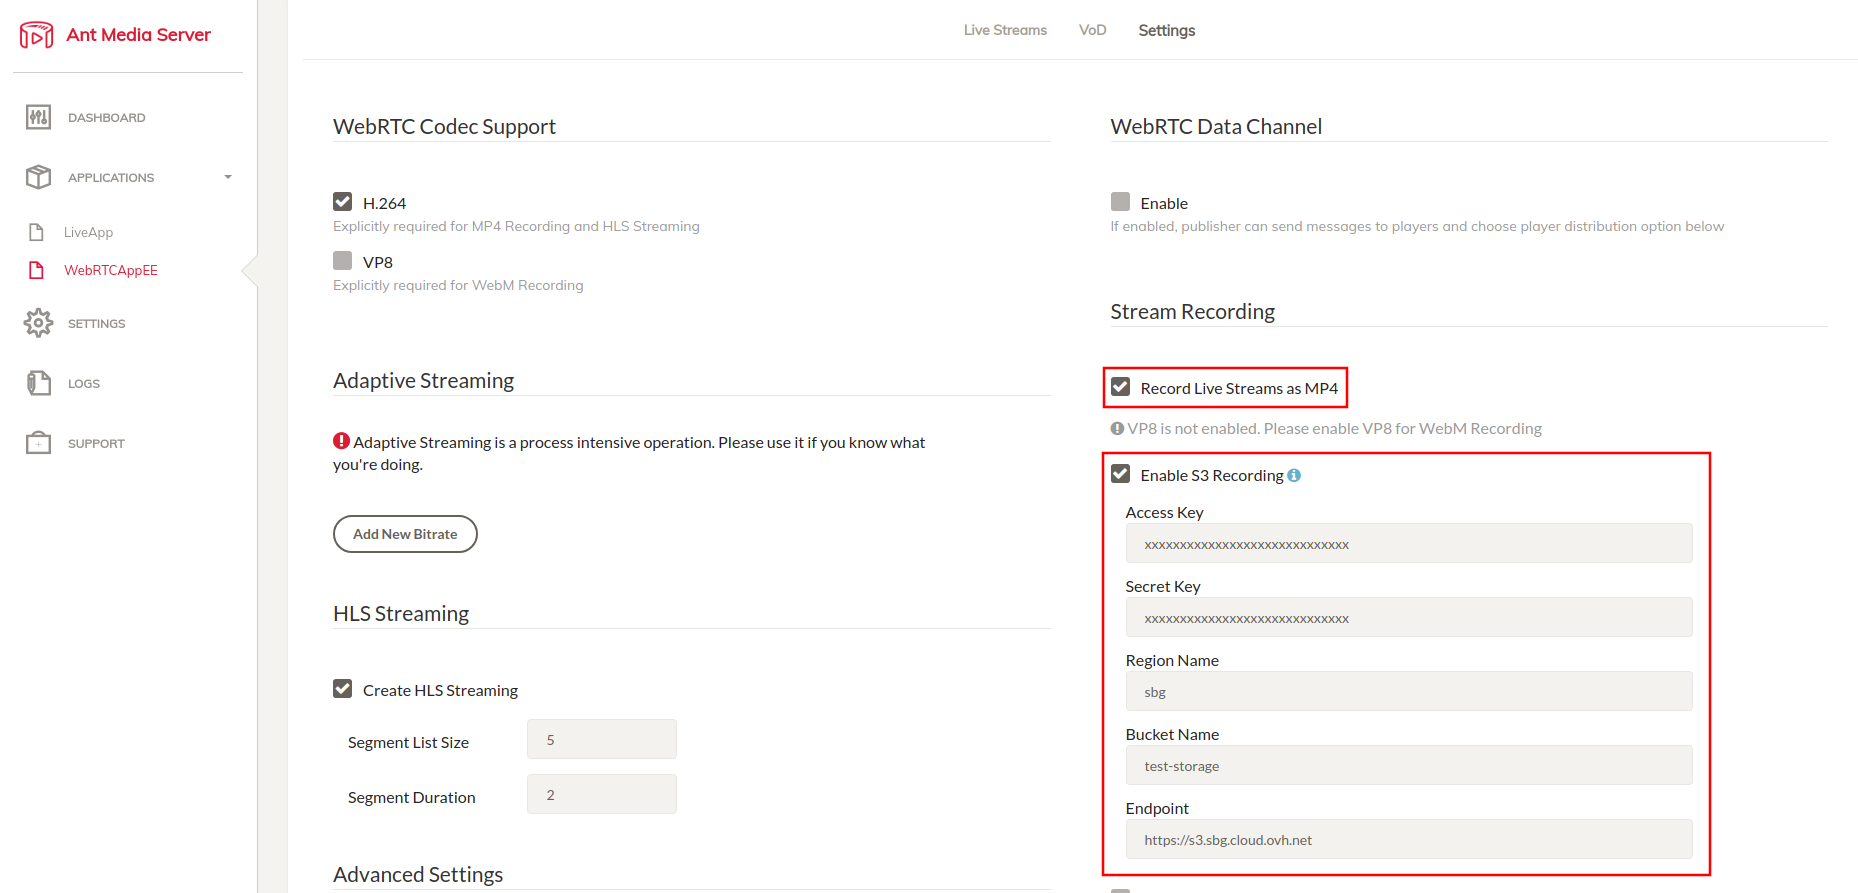
Your MP4 files and Preview files will be uploaded to your OVH Object Storage automatically.
Record streams to Digital Ocean Spaces
DigitalOcean is another cloud provider that is preferred by many Ant Media Server users. You could integrate your DigitalOcean cloud instance easily with S3 cloud storage. Let’s see how it can be done with a few steps!
Firstly, you need to create Spaces. Just click the Space button and fill in the blanks.
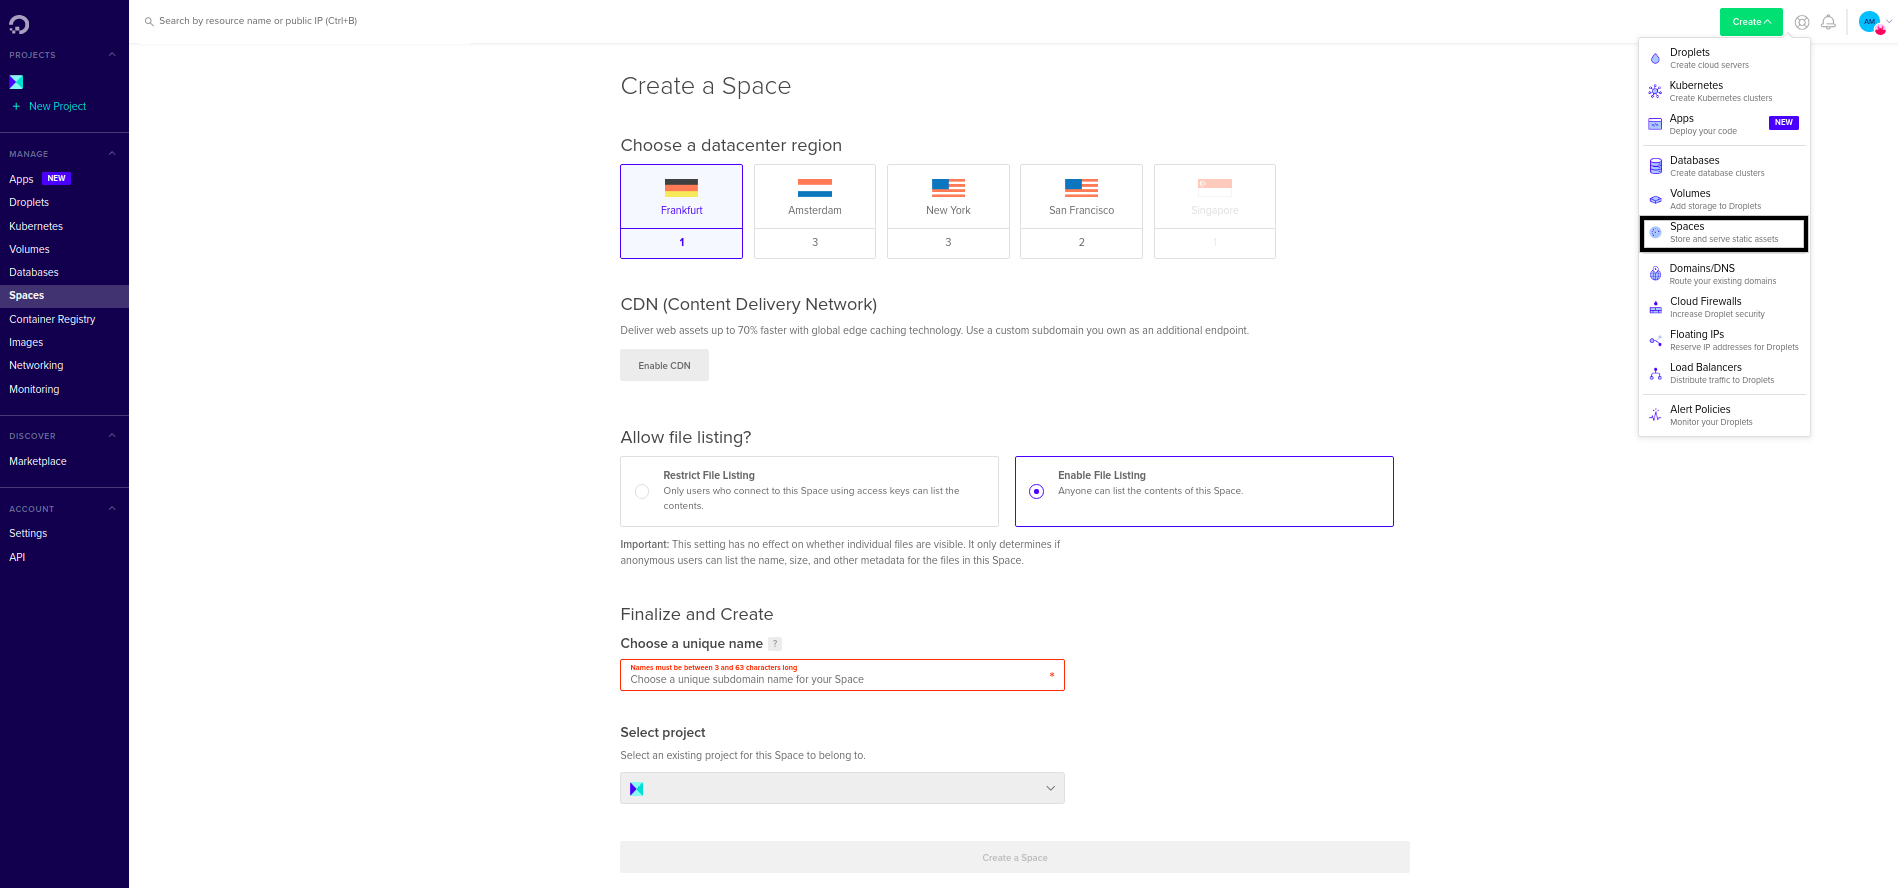
After creating Spaces you need to create API keys for Access and Secret keys. Just click the API button on the left side and then click Generate New Key.
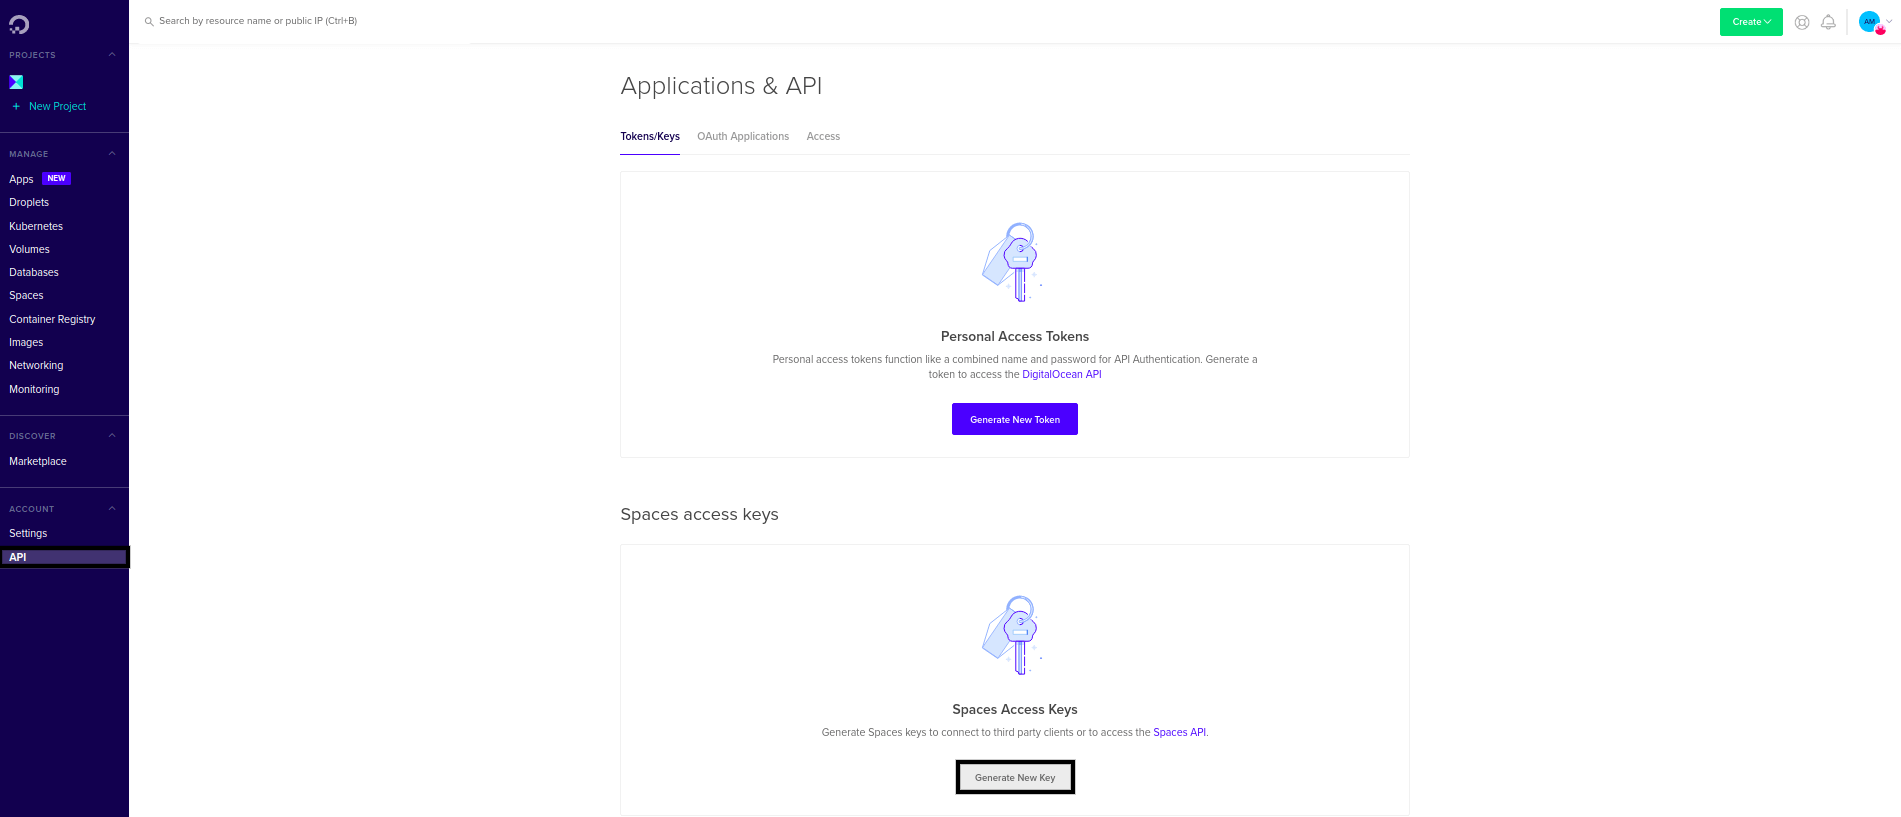
Just type the Name parameter and click the Create button.
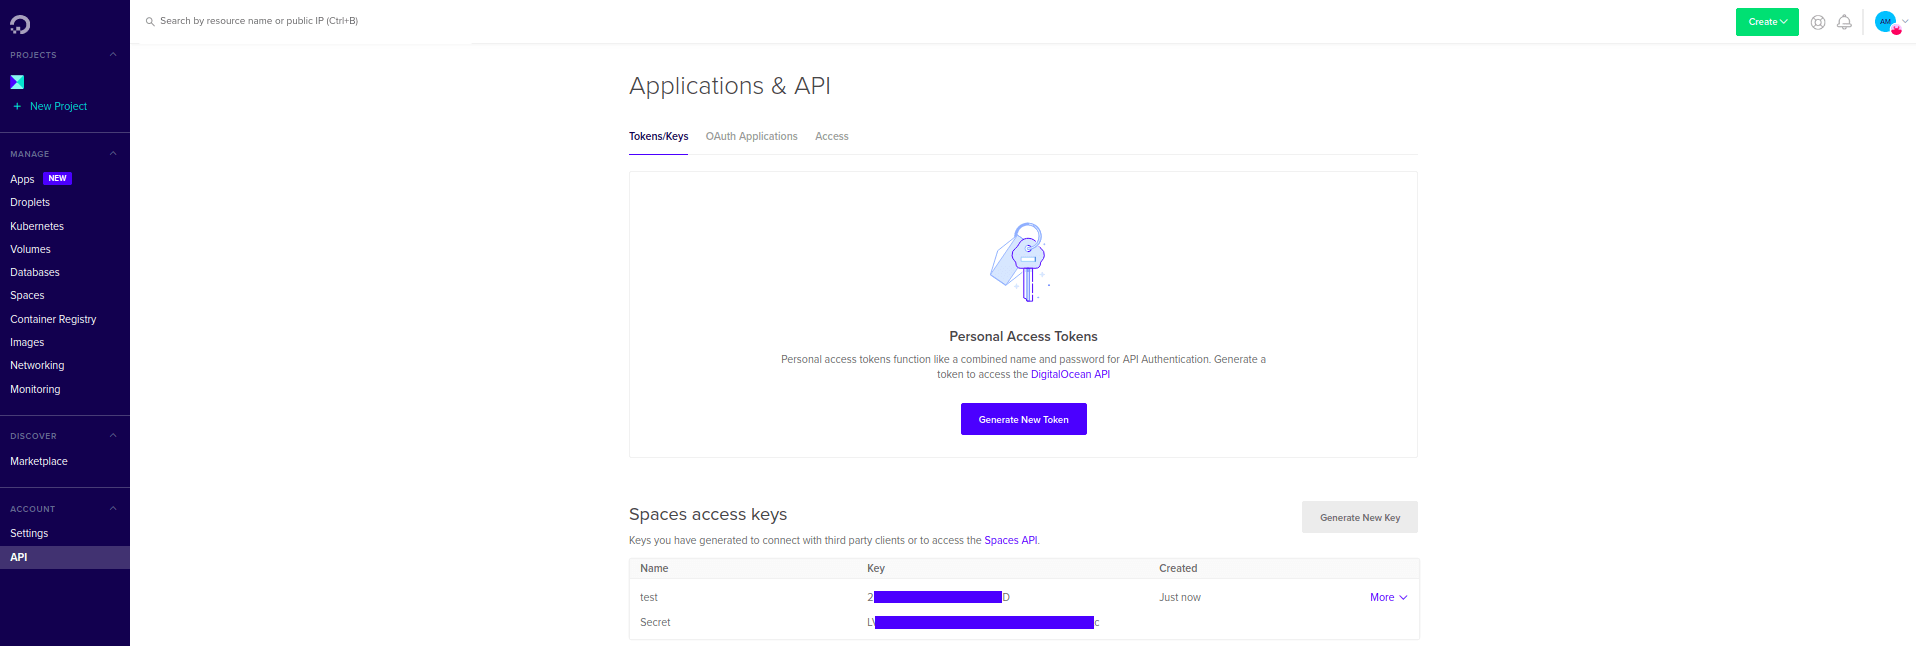
After generating Access keys and Secret keys, there is only one step left.

Then, log in the http://your\_ams\_server:5080, enable the Record Live Streams as MP4 and Enable S3 Recording, enter the S3 credentials you have created, and save the settings.
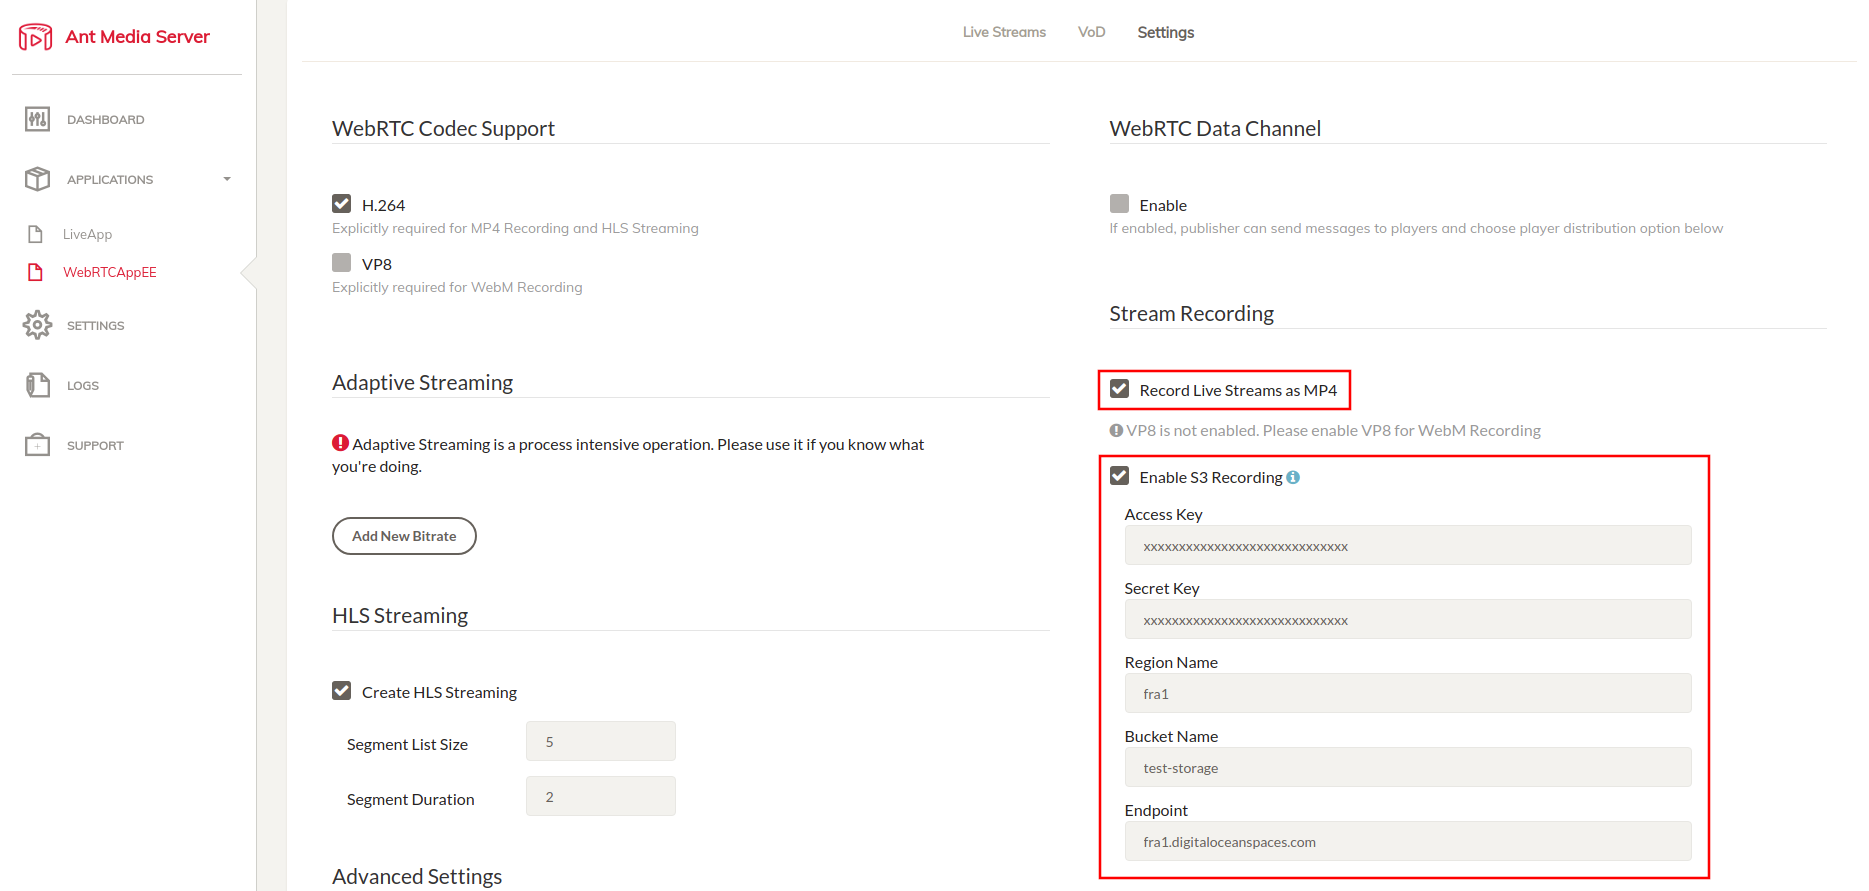
Your MP4 files and Preview files will be uploaded to your Digital Ocean Spaces automatically.
Record streams to Wasabi Storage
Wasabi is another cloud provider that is preferred by many Ant Media Server users. You could integrate your Wasabi storage. Let’s see how it can be done with a few steps!
Firstly, you need to create a new access key in your Wasabi account.
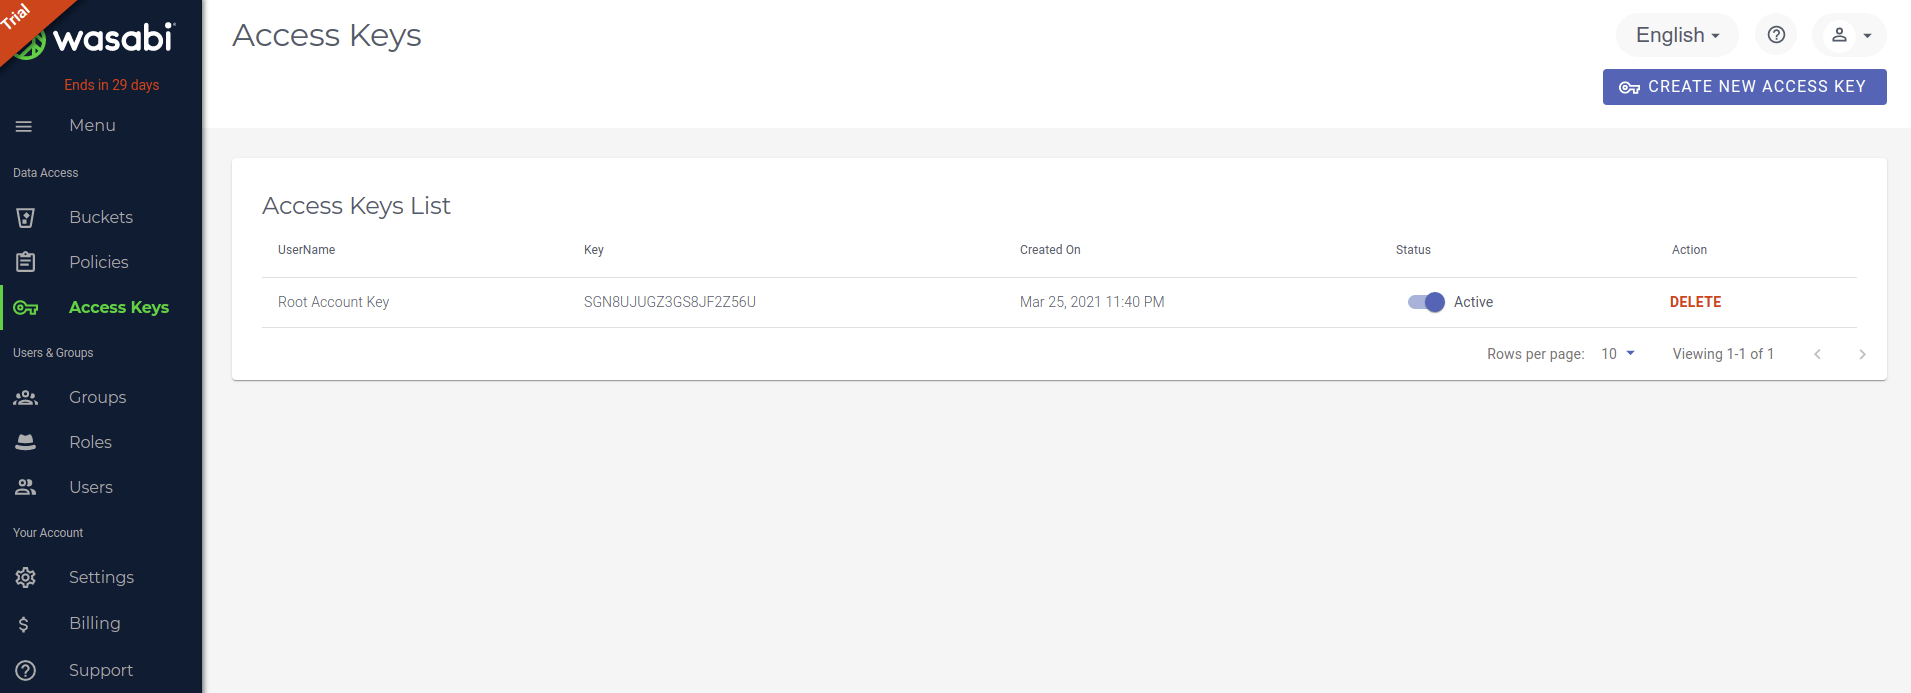
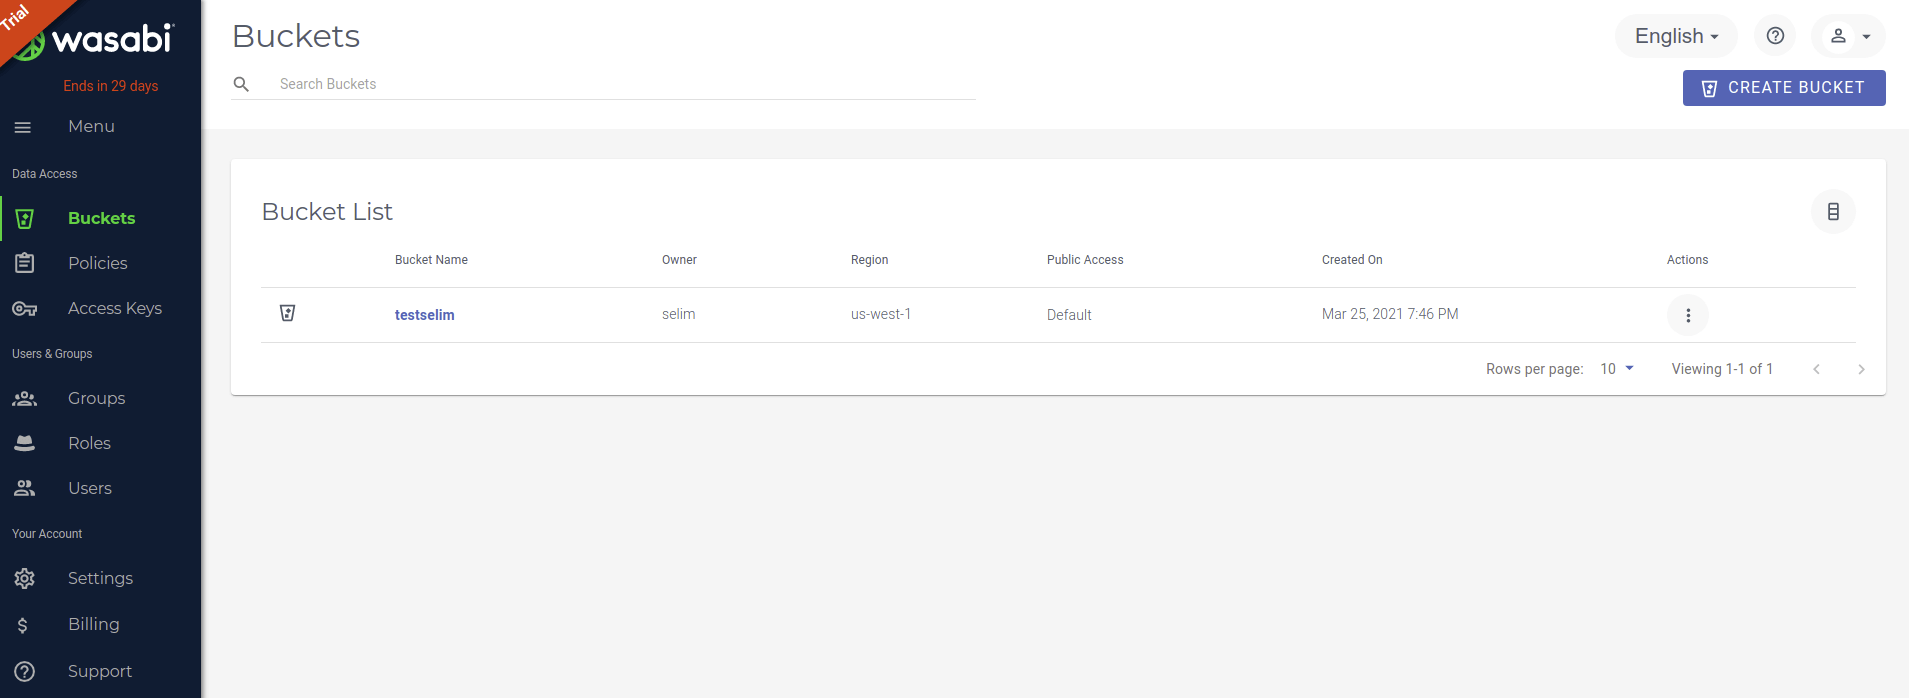
After generating Access keys and Secret keys, you need to create a bucket. Just click the Create Bucket on the right side.
Then, log in the http://your_ams_server:5080, enable the Record Live Streams as MP4 and Enable S3 Recording, enter the S3 credentials you have created, and save the settings.
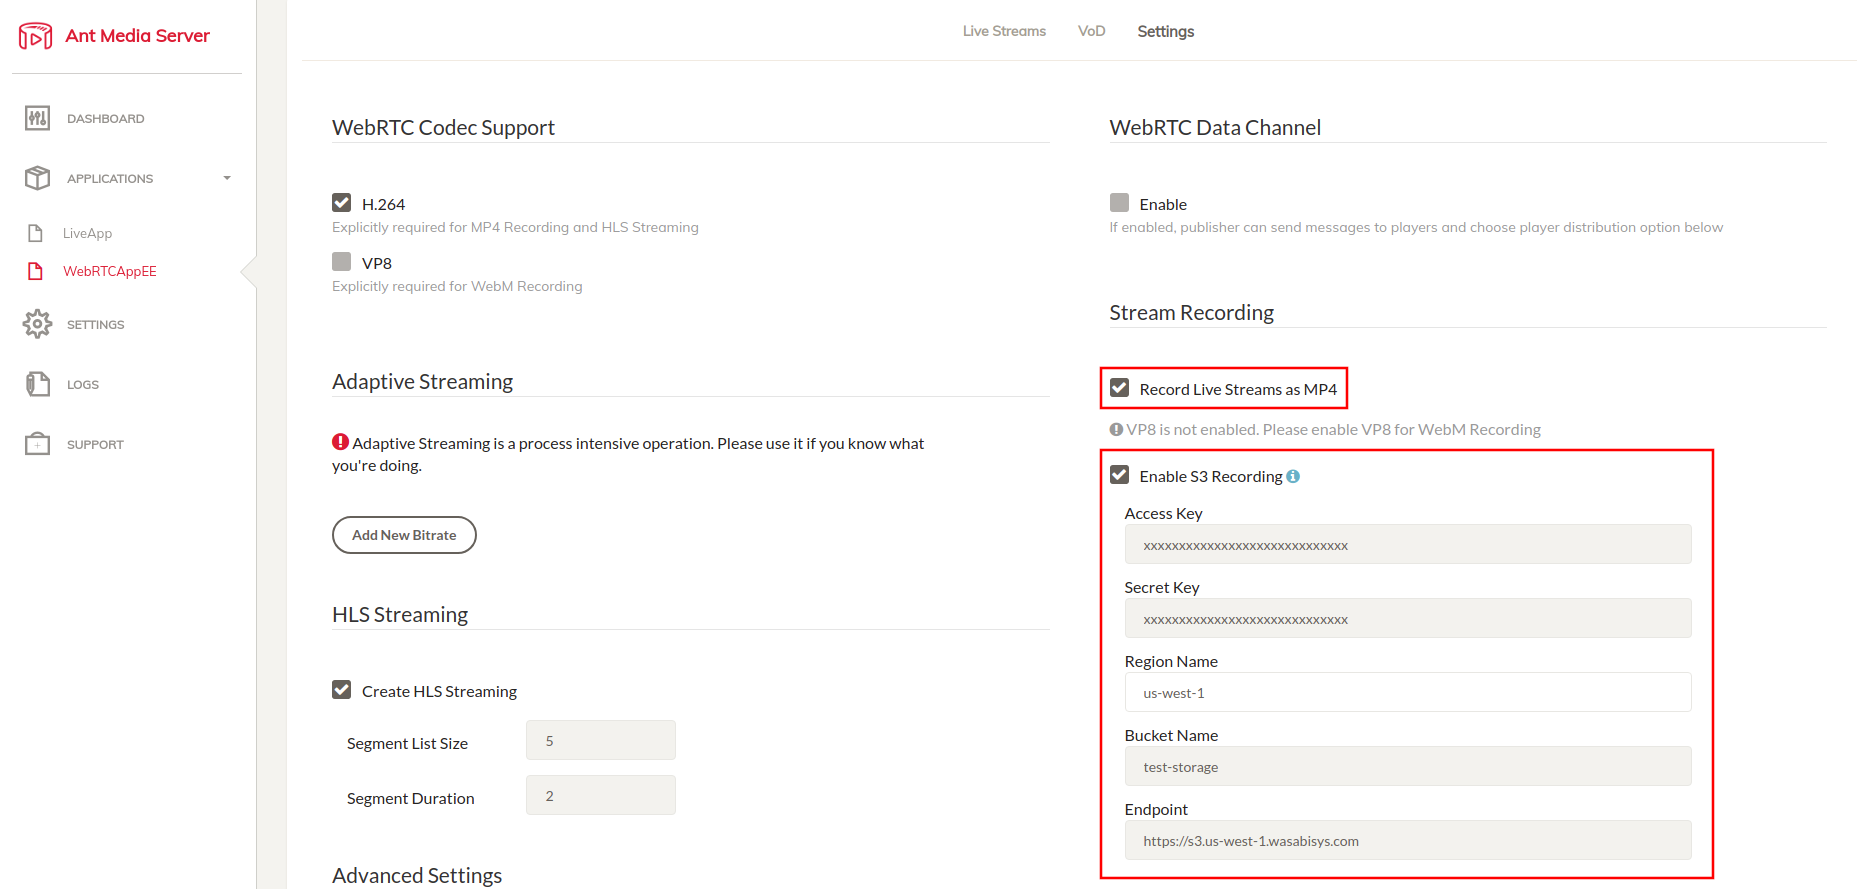
Your MP4 files and Preview files will be uploaded to your Wasabi storage automatically.
Record streams to Google Cloud Storage
Google Cloud is another cloud provider that is preferred by many Ant Media Server users. You could integrate your Google Cloud cloud instance easily with S3 cloud storage. Let’s see how it can be done with a few steps!
Firstly, you need to create a Bucket. Just click the Create button and fill in the blanks. You should choose the access level to Fine-grained.
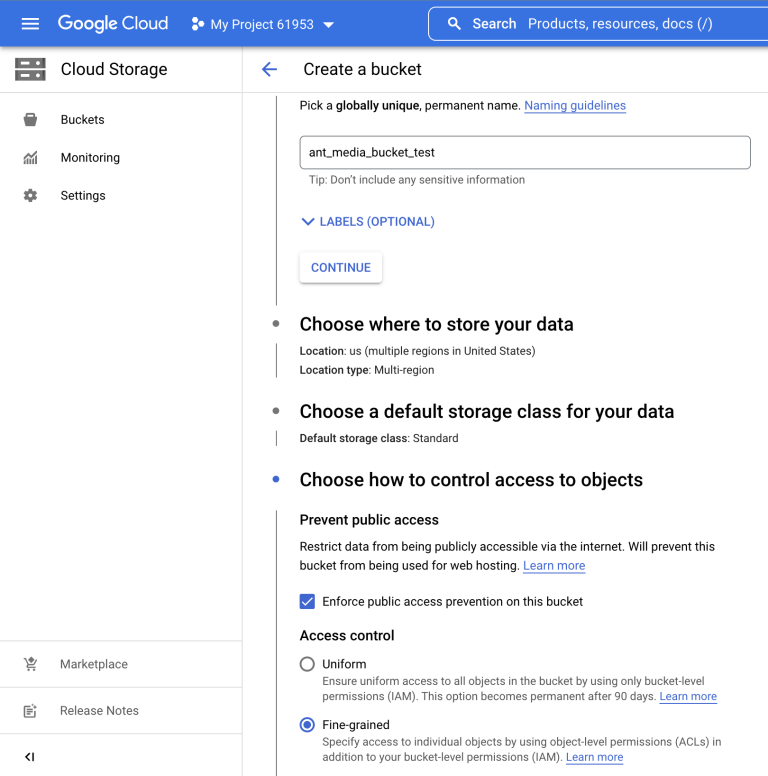
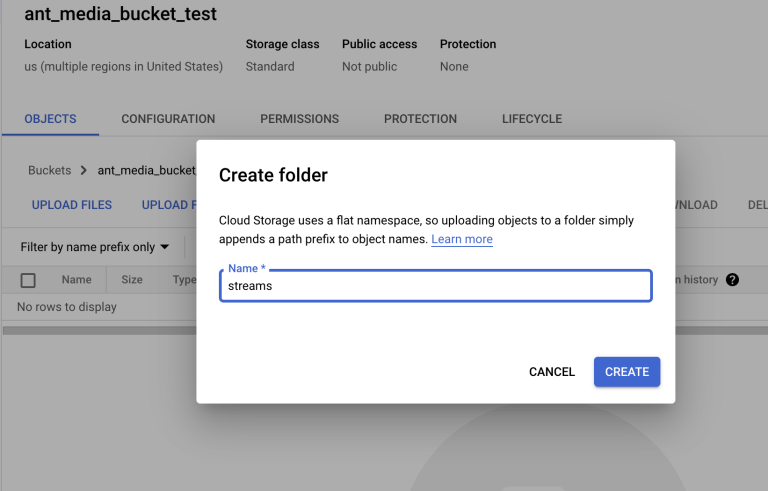
After creating the Bucket, go to the bucket and create a folder named streams.
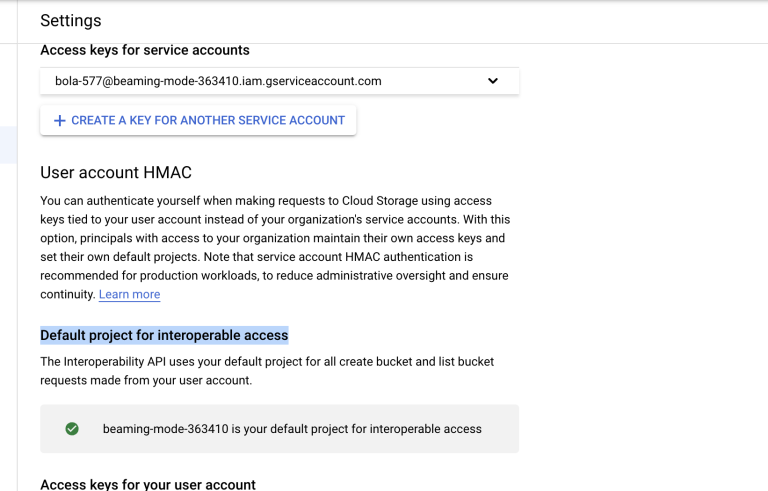
After creating the streams folder, go to the settings and interoperability tab. On the User account HMAC section choose the default project for interoperability access.
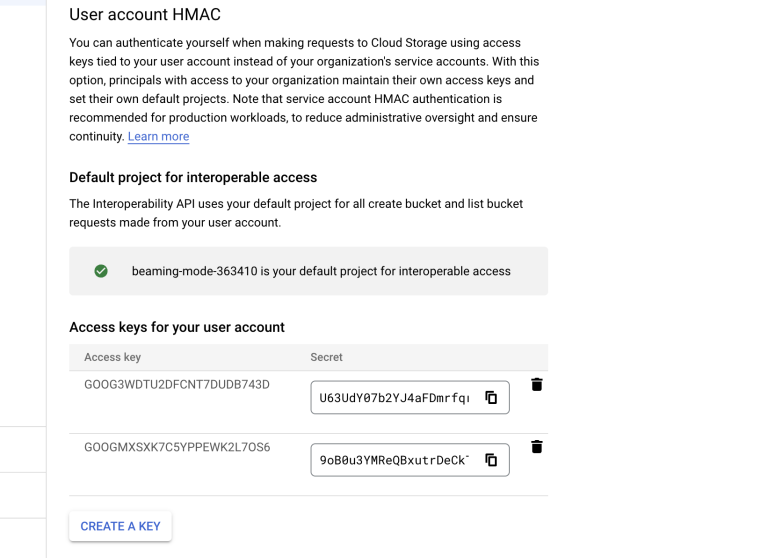
After choosing the default project, create an access key for the user account.
Log in to the Ant media server, enable the Record Live Streams as MP4 and Enable S3 Recording options, enter your S3 credentials, and save the changes. Enter "auto" for Region Name and "https://storage.googleapis.com" for Endpoint.
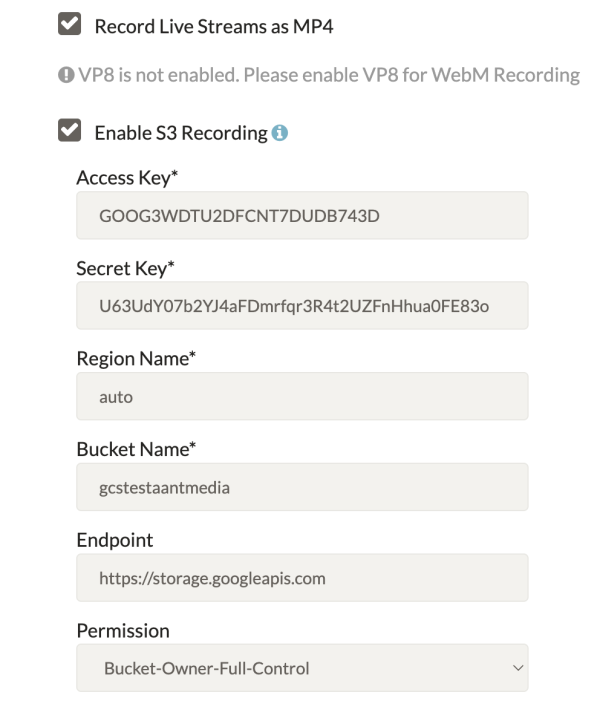
Your MP4 files and Preview files will be uploaded to your Google Cloud Storage Bucket automatically.
HTTP Forwarding
HTTP forwarding is implemented to forward incoming HTTP requests to any other place. It's generally used for forwarding incoming requests to a storage like S3.
Let us tell you how HTTP Forwarding works step by step
- Open the management panel of your AMS, go to the Application settings, and switch to Advanced settings
- Add comma-separated file extensions like this
settings.httpforwarding.extension=mp4,pngto the file. - Add the base URL with
httpforwarding.baseURL=https://{YOUR_DOMAIN}for forwarding.
Usage Example:
-
If you are using AWS S3 bucket,
{YOUR_DOMAIN}will be like:
{s3BucketName}.s3.{awsLocation}.amazonaws.com. -
If you are using Digital Ocean Spaces, {YOUR_DOMAIN} will be like:
{BucketName}.{BucketLocation}.digitaloceanspaces.com
Note: Don't add any leading, or trailing white spaces.
- Save the file. If it's configured properly, your incoming MP4 requests such as
https://{SERVER_DOMAIN}:5443/{APPLICATION_NAME}/streams/vod.mp4will be forwarded tohttps://{YOUR_DOMAIN}/streams/vod.mp4.
HLS HTTP Endpoint
HLS HTTP Endpoint is implemented to push the HLS content(m3u8 and ts files) to any HTTP endpoint such as CDN or your own HTTP endpoint. You can enable it with the following steps:
-
Open the management panel of your AMS, Go to the Application settings, and switch to Advanced settings.
-
Add the following property to the file:
hlsHttpEndpoint=https://example.com/hls-stream/
Kindly make sure to update the HTTP URL with your own.
- Save the file to apply the settings.
After that just push a stream to Ant Media Server with stream123, AMS will push the files to the following endpoints with the PUT method
https://example.com/hls-stream/stream123.m3u8
https://example.com/hls-stream/stream123_360p800kbps0001.ts
https://example.com/hls-stream/stream123_360p800kbps0002.ts
https://example.com/hls-stream/stream123_360p800kbps0003.ts
https://example.com/hls-stream/stream123.m3u8
. . .
Uploading HLS files to the S3 bucket in real-time
When you use S3 integration your record will be uploaded as soon as the livestream finished.
If you want to upload your HLS content(m3u8 and ts files) in real-time to the S3-compatible systems(AWS, OVH, Digital Ocean, etc.) you can use the HLS Upload servlet.
To be able to use the HLS Upload servlet first, you should enter S3 credentials into the management console. Then, you can use HLS HTTP Endpoint instructions with the following property:
- Open the management panel of your AMS, Go to the Application settings, and switch to Advanced settings.
- Locate the setting hlsHttpEndpoint and set it to:
hlsHttpEndpoint=http://localhost:5080/LiveApp/hls-upload
Here, LiveApp is the application name and you can replace it with your preferred application.
- It can also be set as:
hlsHttpEndpoint=https://{SERVER_DOMAIN}:5443/{APPLICATION_NAME}/hls-upload
How to play AWS S3 VOD files with Embedded Web Player?
If you would like to embed the VODs stored in AWS S3 bucket, you need to configure CORS parameters on AWS S3 Bucket Permissions
CORS parameters of the AWS S3 bucket should be modified so that the requests that are coming from another origin to play the VODs can be processed.
Go to your AWS -> Services -> S3 -> Buckets -> "Your Bucket" -> Permissions And at the bottom of the page, there is Cross-origin resource sharing (CORS). The CORS configuration, written in JSON, defines a way for client web applications that are loaded in one domain to interact with resources in a different domain."
Click Edit->` and paste the code provided below:
    [
        {
            "AllowedHeaders": [
                "*"
            ],
            "AllowedMethods": [
                "HEAD",
                "GET",
                "PUT",
                "POST",
                "DELETE"
            ],
            "AllowedOrigins": [
                "*"
            ],
            "ExposeHeaders": []
        }
    ]
"*" on the origin field as it accepts requests from all origins, it can be used for quick testing. However, it can be changed to allow permissions for exact origins, such as "http://www.your-domain.com" since you only want to accept requests that are coming from your end.